Introduction
Ever since I got my first smartphone, I wanted to make a stand/holder for it because most of its time it spends on my desk. There are plenty of smartphone designs available on the net, but I wanted to reuse some pieces of hardware I already had and also give it a personal touch. Finally, I came up with this design – I think this is the first of its kind:
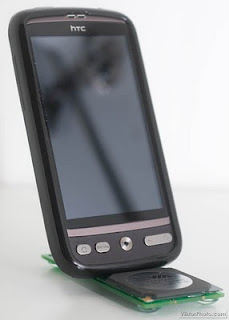 |
| Please meet the SmartPhone PCB Stand! |
Materials
- 2 pieces of recycled PCB. I used some PCBs that I ordered some time ago but was messed up in manufacturing.
- 1 small door hinge of your choice. Any hinge of your linking will do as long as the two flaps of it cannot go all the way in both direction. The one I had at hand can close fully in one direction, but will stop at an angle in the other. This is important as this will determine the angle at which the phone will rest.
- Some fancy chip from an old circuit. I scavenged a nice looking chip from an old motherboard that was not working any more. It’s part of a Via chipset. I used this particular one because the dimensions fit my scrap PCB perfectly. Originally, I planned on using an old Pentuim processor, but it proved too big for my PCB.
- Some kind of glue that is strong enough to hold all these together while supporting the weight of the phone. I used hot glue to make the prototype, but I am prepared to replace it with something stronger should it prove weak on the long term.
- Optional: I used four small rubber discs on the bottom of the assembly to prevent any scratch on the surfaces I am going to put my phone stand on. They are similar to the ones you can find on the bottom of almost all household appliances, devices, but smaller.
Assembly instructions
-
Mount one flap of the hinge to the end of one of the PCB pieces.
-
Mount the other flap of the hinge to the desired position on the other piece of PCB. At this stage you the top PCB should rotate freely between the other PCB and at a certain angle.
-
Mount the fancy chip on the base PCB aligned nicely at the front – this will prevent the phone to slide down at the front.
-
Optional: attach the rubber feet to the bottom of the base PCB.
-
Done!
Pictures
 |
| The finished product |
 |
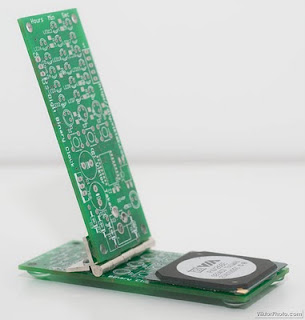
| Back view |
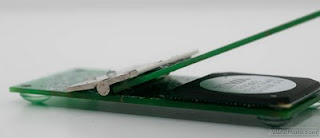 |
| The hinge in “closed” position – it’s not airtight, but it serves the purpose |
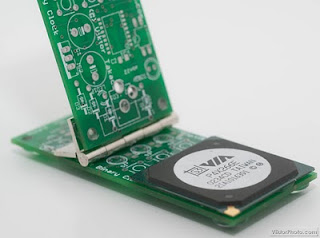 |
| The hinge in “open” position |
Related


Nice work. Short and simple 🙂
Pimptacular.
Thanks, I'm glad you like it!
Deep in my heart I just knew it that VIA chipset is not a complete junk and that it can be useful effective and efficient somewhere! I just knew it! I only get sick when i meet those inside computers.
@Giorgos Lazaridis: :-))))))) A very good joke to wake up to :-))))))