
Introduction
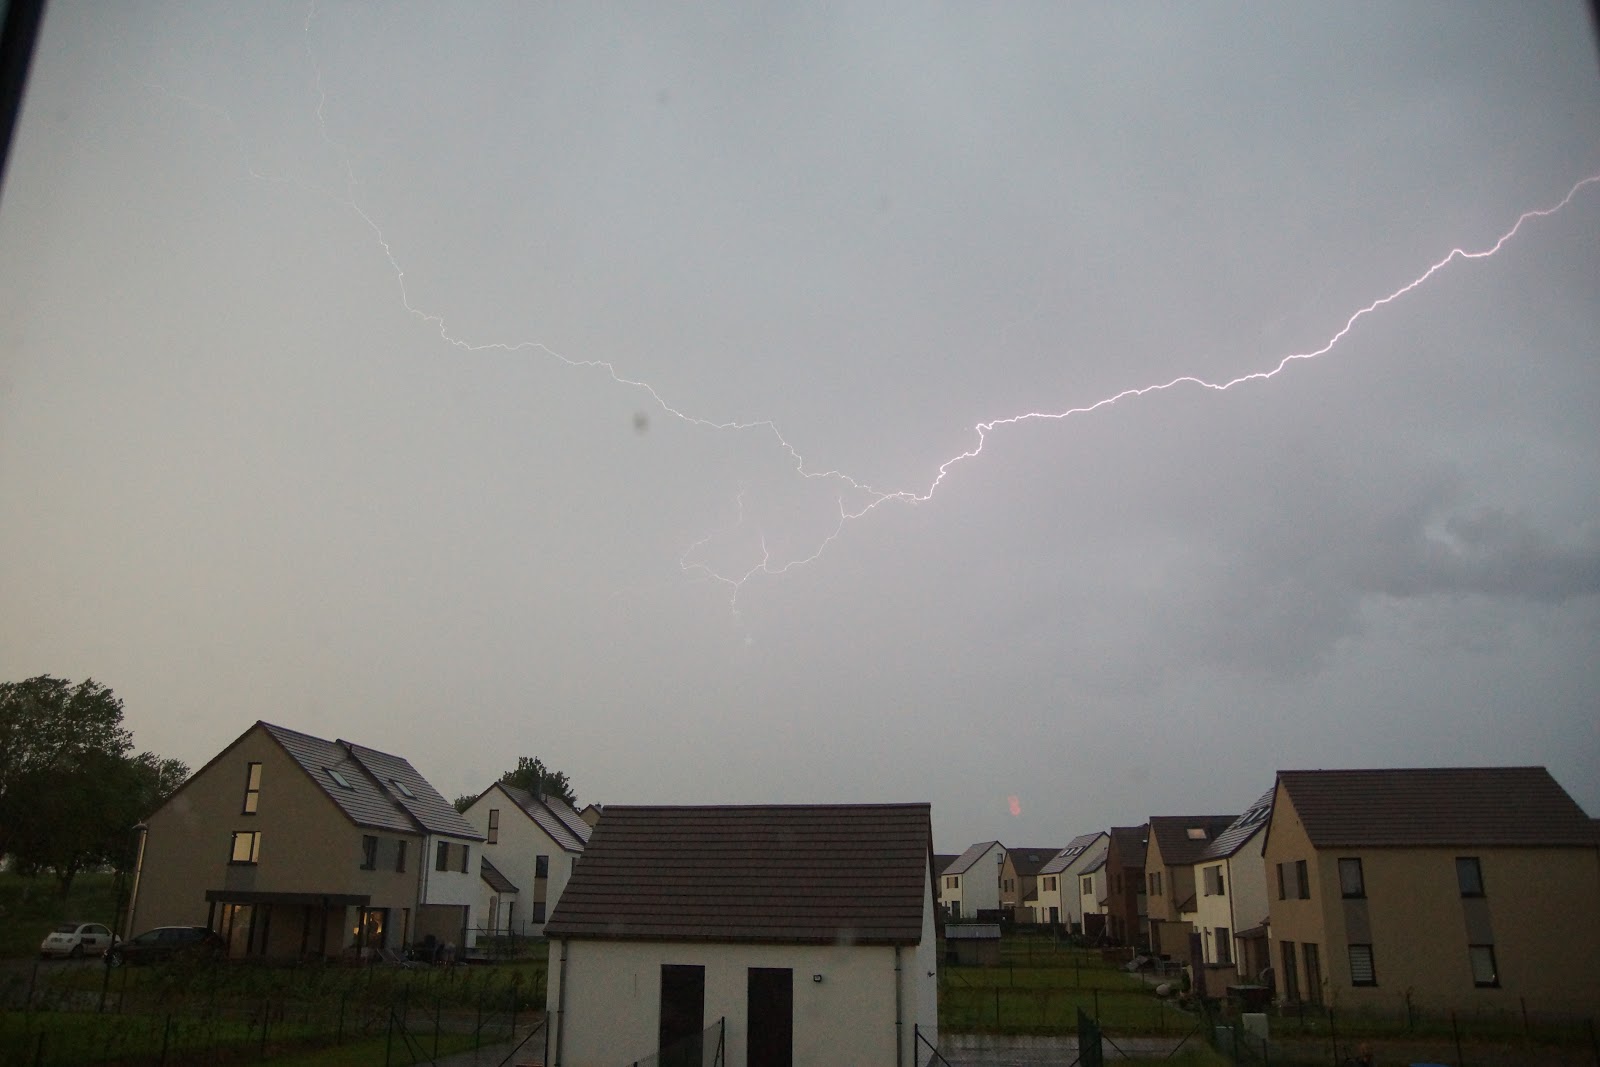
I have always been fascinated by photographs about lightnings. While it is relatively easily to put a lightning strike in any photograph using image editing techniques 🙂 I still prefer the real thing. Since photography is a hobby of mine, I wanted to be able to photograph lightnings. However, when I tried to do it without any specialized equipment, I didn’t have much success.
Reading a bit about the subject on the internet I found there are many designs/solutions available, to get around the problem. Since the price of the commercially available ones are too high for my budget (and let’s face it, it’s not much fun buying something ready made when you can also make it yourself), I decided to make one for myself for less.
I found many similar designs on different web sites and finally I came up with my own, which is – admittedly – very similar to one particular one I found on this photography site (only in Hungarian). I kept most of the design, but replaced the relays with opto couplers and put the whole thing in a plastic box to make it easy to drag around.
If you are interested to make one like this, please e-mail me. I can provide you with customized kits that contain as many or as few components as you need/like (from just a programmed microcontroller to a fully built and tested PCB) to suit your experience/skills. Please note, I do NOT provide the enclosure as it is very time consuming for me to make. The code for the PIC is also available on request.
Hardware
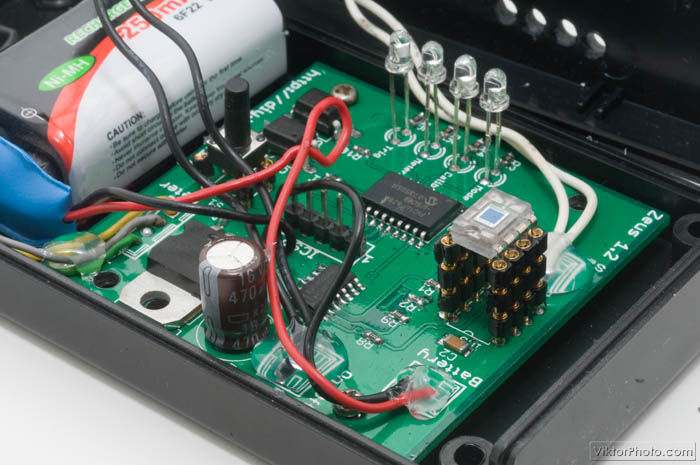
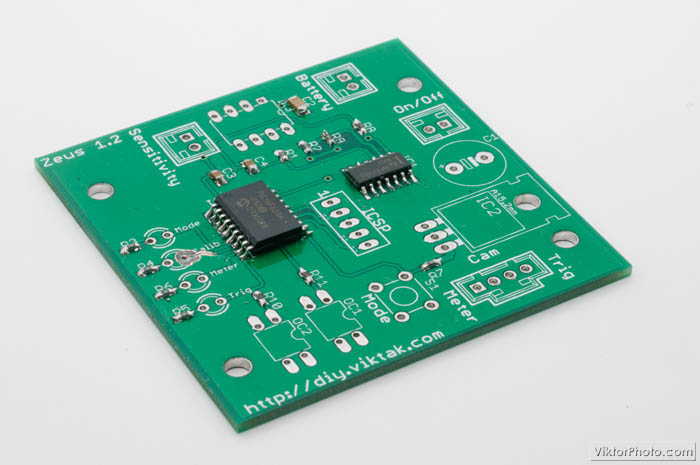
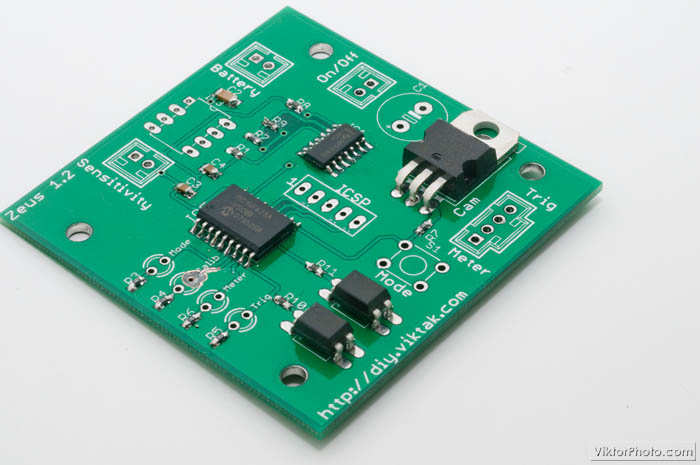
The circuit is based on a 16F628A PIC microcontroller. This is one of my favourite PIC micros and I have used it in several previous projects.
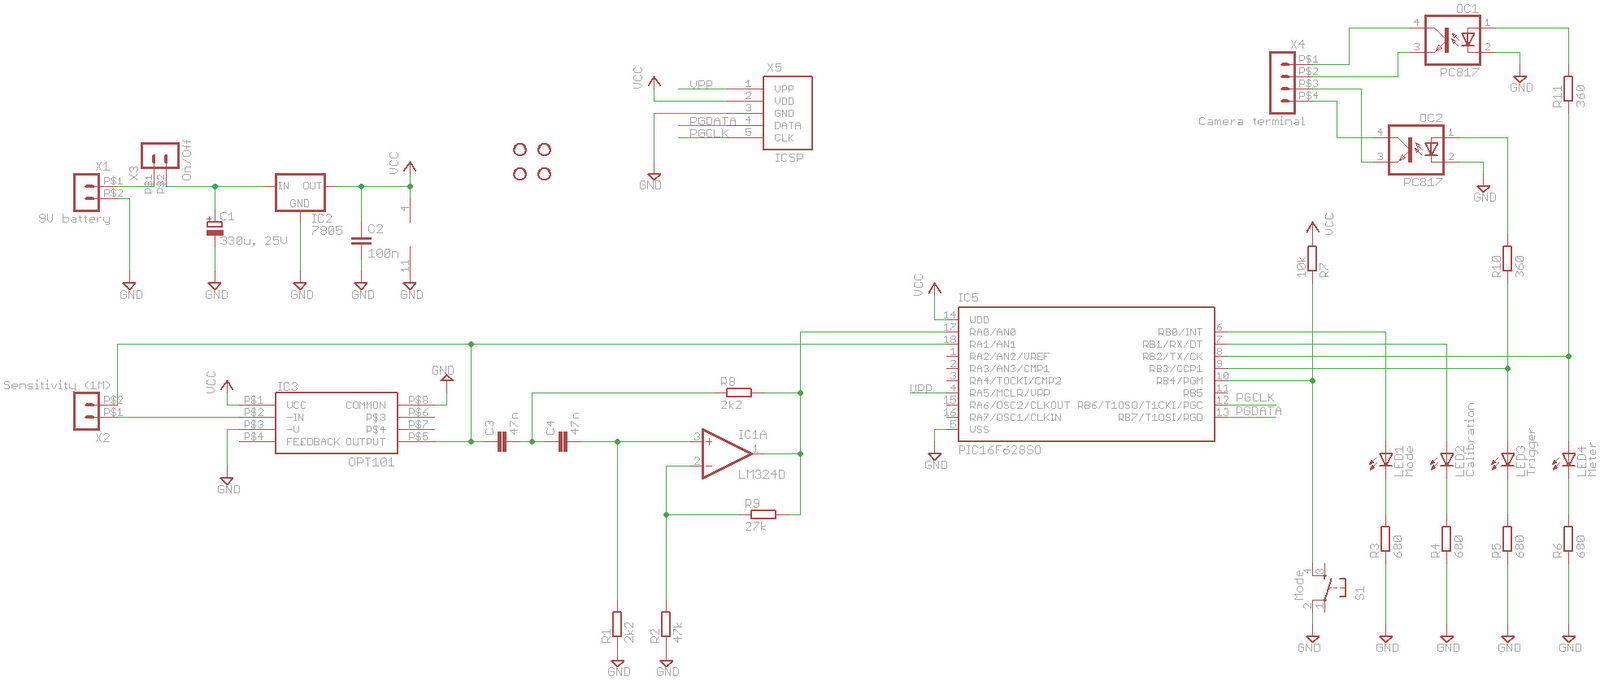
The light sensing part (OPT101) is a monolithic photodiode and single-supply transimpedance amplifier in a single 8DIP package allowing a smaller final product size. When designing the PCB care must be taken to position this part in a place where it can “see” the ambient light and lightning bolts. The connection with the camera is provided by two opto couplers. This allows the camera’s circuitry to be completely decoupled from my circuit so that any problem in my circuit will not damage the camera.
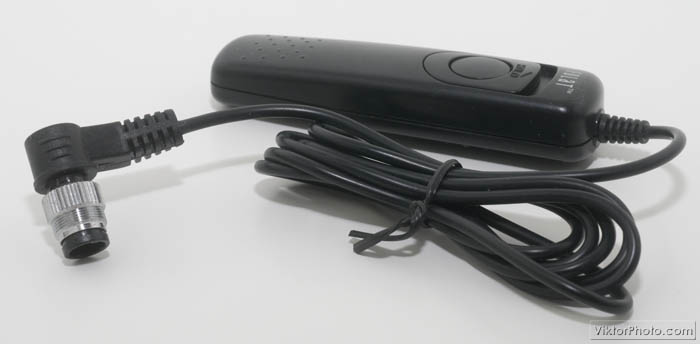
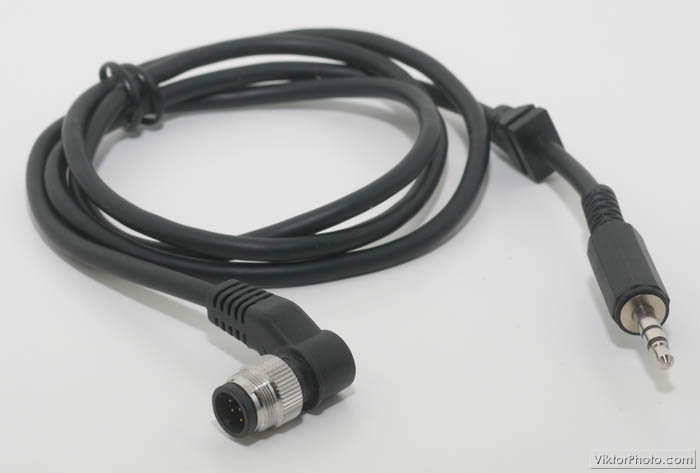
The cable that attaches to the camera is recycled from an old, cheap camera remote release cable – I just removed the original buttons from it. These remote release cables (for any camera that supports it) can be easily sourced through eBay for a couple of euros. My latest one for Nikon cameras cost around €1,50. The advantage of this is that you don’t have to prepare your own special cable/connector combo for a specific camera, which can be tricky.
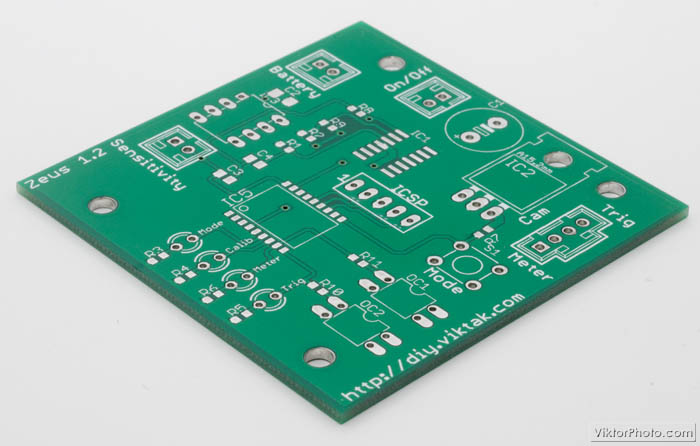
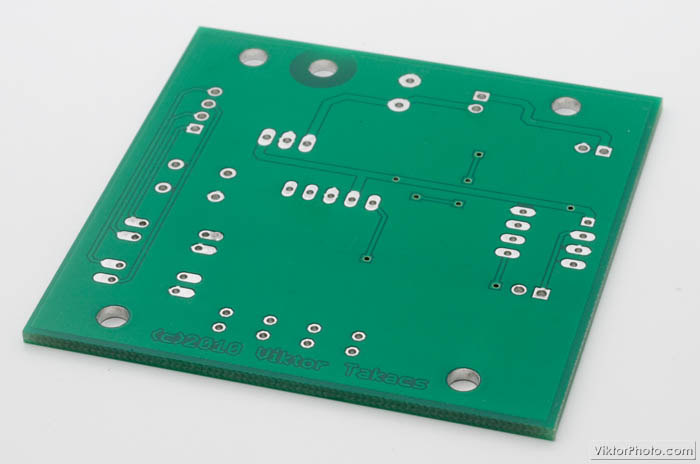
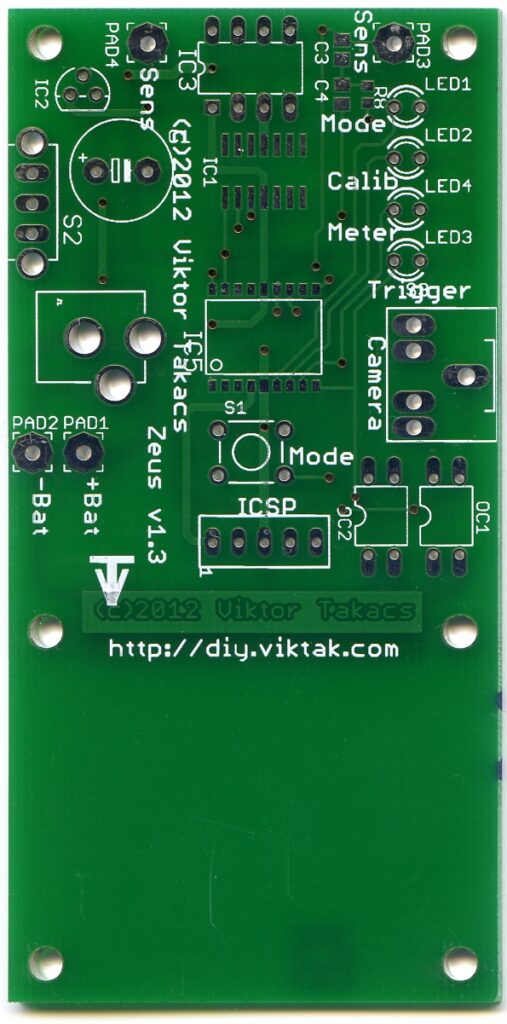
The PCB was designed to use mostly SMT parts to save on PCB manufacturing costs and make the device as compact as possible.
The circuit also contains an ICSP interface for easy development.
You can order your own PCBs here.
Operation
After powering up, the circuit enters calibration mode. In this mode the user must adjust the light sensitivity. This is to allow operation in both total darkness and with some ambient light. The best setting is when the Mode and the Calibration LEDs are bot lit up (or almost), although this is not critical.
By clicking once the Mode button the device is armed and waiting for the lightning. This is signalled by lighting up the Meter LED. At the same time the camera enters metering mode (the equivalent of pressing the exposure release button half way). When the device senses a sudden change of ambient light it lights up the Trigger LED for a while and sends the exposure release signal to the camera synchronously (the equivalent of pressing the exposure release button all the way). For proper operation the camera’s autofocus feature should be disabled and a suitable long exposure time should be set.
In the following video I demonstrate the operation of the device. Unfortunately, I haven’t been able to test it in an actual storm with lightning, since I live in an area where storms are very rare (Greece). Instead, I faked the lightning with a flash activated manually. If you listen carefully you can hear when the camera enters “metering” mode and when it takes the photograph.
Steps shown in the video:
- Switching on the device
- Calibrating for the light available in the room
- Arming the device
- Simulating a lightning
- The camera is triggered and the picture is taken – you can see it showing up for a few seconds on the camera’s screen.
Battery life
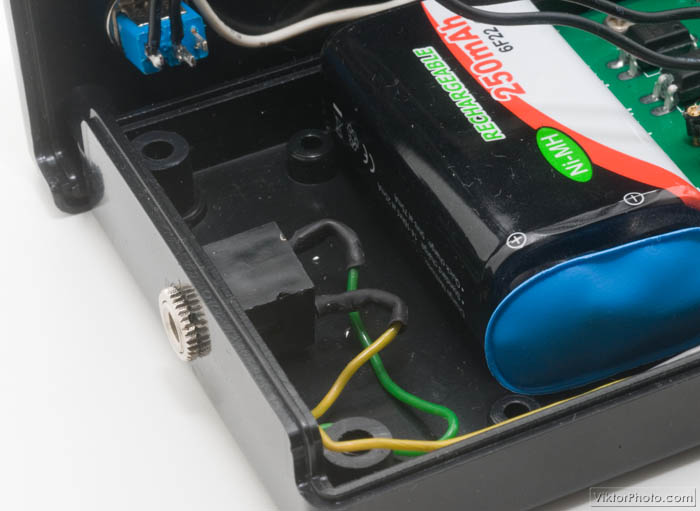
I used a very low quality, “no name” rechargeable 9V Ni-MH battery for the tests. During tests conducted in-house I was able to keep the device continuously in armed mode (awaiting lightning) with the occasional exposure (you can test it very easily with a manual flash) for more than 5 hours with one charge. This is more than enough to cover a storm since most ones with lightnings are very brief (at least in my area).
Although the battery is “no name”, the connections try to be professional – shrink tubes protect each solder joint on every off-the-PCB part.
Case for the circuit
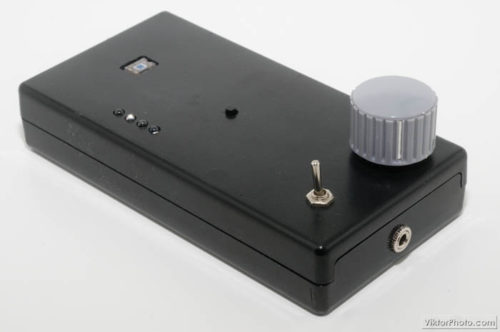
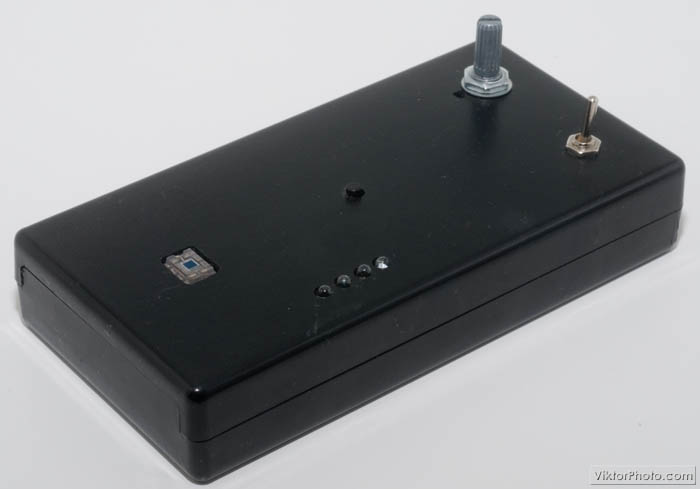
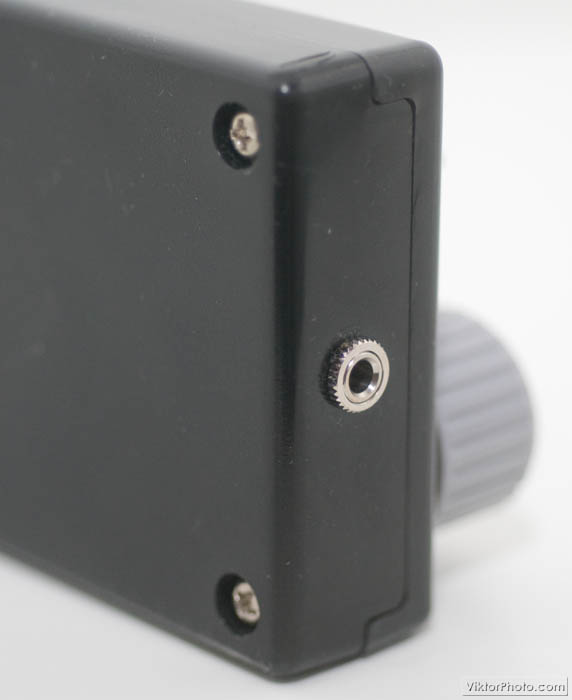
The most difficult part of the project (for me) is almost always the presentation, i.e. a nice, user friendly case or housing. For this project I ordered a small plastic project box on eBay and customized it. The box is 130*24*68 mm, big enough to contain all the parts including the PCB and a 9V battery.
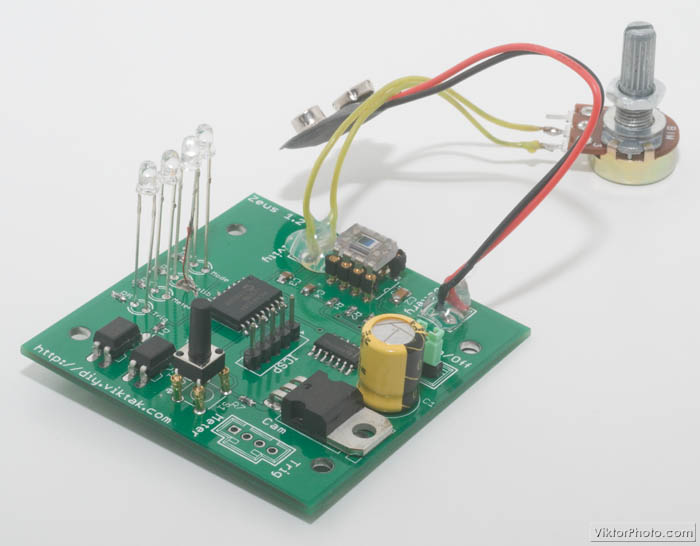
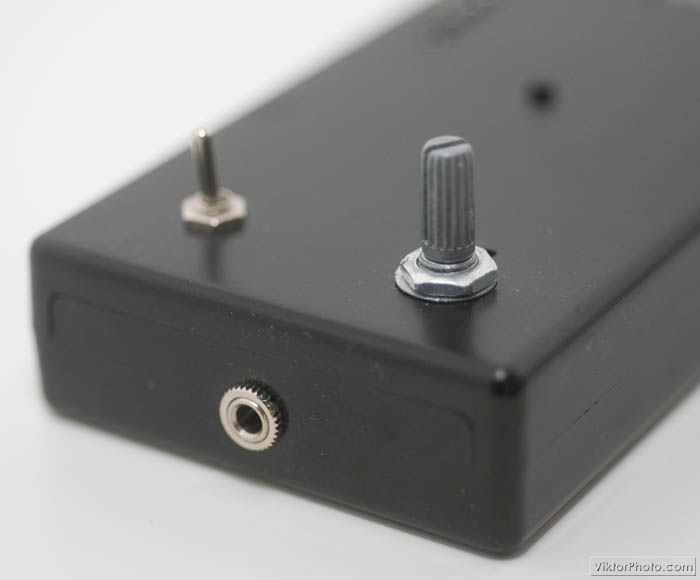
I designed the PCB so that the light sensor, the control LEDs and button are nicely aligned with each other, so only holes had to be drilled on the face of the box. Only two components (+ the battery) are separate from the PCB: the on/off switch and the sensitivity potentiometer. They are both mounted on the face of the box under the battery.
The PCB was designed to fit snugly in the enclosure box next to a 9V battery
Possible future improvements
- If I have some time in the future I may change the software to auto calibrate the device, i.e. the user should not fiddle with it manually.
- Once I find a suitable socket, I will also add external power support which will power the device as well as recharge the battery in the enclosure.
More images
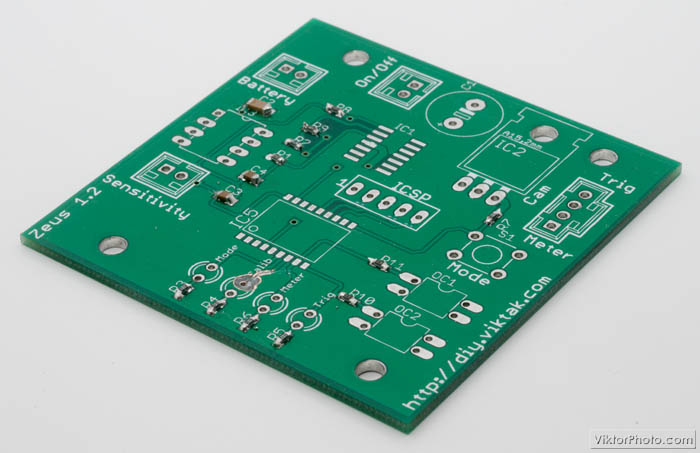
I took the following pictures while I was assembling a device for someone. This is the recommended order of assembly, from small to larger elements.
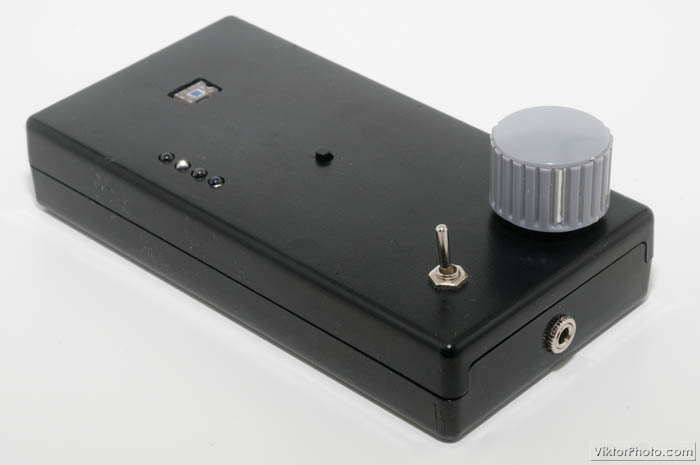
And finally, some close ups of the enclosure.
Some sample photographs from photographers using the above trigger
Update 23/01/2013
I have made some improvements to the PCB. It got smaller and some of the parts that have not been integrated to the PCB are now soldered to the PCB.

Update 6/8/2013
I just won Lifehacker’s “Best Camera Hacks” competition with this entry!


Nice job, it looks very professional.
Could you show us some example pictures using this device?
Nicely done, I am currently building a trigger on my own, and I think I will implement the idea with the opto-coupler…
Really a nice job…
I think you forgot to include the video in your post.
@ptantiku: I finished this project a couple of months ago, and since then we have never had any storms in this area. As soon as I will some images taken I will post some. Sorry about that.
@Anonymous, @r0oland: Thanks for stopping by!
@Dan: I apologize. There seems to have been some problems with Blogger or something because I am sure I included the video before publishing the article. This morning all the images also disappeared. Now I have re-uploaded and linked them, so they should be all OK now. Thanks for letting me know!
Why not just use one of fifty canon cameras supported by SDM's motion-detection feature ? :-
http://stereo.jpn.org/eng/sdm/index.htm
Motion detection is done entirely in the software that runs on the SD card.
http://stereo.jpn.org/eng/sdm/motion.htm#mx3
@Anonymous: Well, I'm not familiar with SDM, but from what I saw in 2 minutes on the site you mentioned it's not quite the same.
For starter, it only supports a handful of Canon cameras, my gizmo works with any camera (SLR or point and shoot, digital or film) with remote release connectivity. Also, it seems to me that it triggers on movement rather than light change (although these might be closely related, I don't know).
Thanks for letting me know about SDM, though! Interesting project.
Can You Add A photo Of The PCB
Thanks
The PIC It Is 16F628A-I/SO ?
FYI – SDM is a spin-off of CHDK – http://chdk.wikia.com/wiki/CHDK
Still limited to Canon cameras as you noted but if you don't have the hardware skills (or time) to build your more elegant system it might do – look for Motion Detection scripts.
@Anonymous: Yes, it's a 16F628A in SO (150mil) package.
@Anonymous: Yes, I have previously heard of CHDK and have been jealous of it since I don't have a Canon system 🙂
Would you have any info on how well the motion sensing scripts could be used for sensing change of light?
Well, I would not call 56 cameras 'a handfull' :-
http://stereo.jpn.org/eng/sdm/cams.htm
It detects sudden change of light intensity as well as motion and is widely used for lightning photography :-
http://chdk.wikia.com/wiki/Samples:_Lightning_photography
You can even specify what colour to detect and its location on the screen.
When the lightning is detected you could even flash the cameras autofocus led and with a simple phototransistor circuit trigger a DSLR.
@Anonymous: Cool, it's great that it can be used for lightning photography, now I see.
I still stand by my "handful" 🙂 though: if you compare those 56 cameras with all the cameras from all the manufacturers, it IS a handful. I didn't mean to lessen the value of CHDK and I do feel jealous because I can't use it!
Good project, and the case is very professional. Your idea for auto calibration is a good one. Anything that reduces user input and makes the device more reliable should be implemented. You might add an ELF receiver, as lightning has quite an EMP when it strikes, and use a coincidence detector in software to eliminate false triggering on car headlights at night, but that might be overkill. Good work, and I enjoyed reading your article.
@William J Remski: Thanks for the ideas!
Nice one Viktor !
Can you buy that PCB as is, or do you need to prepare and etch it you self ?
Salute Drecked
@drecked: I designed the PCB then I had it mad in a professional PCB manufacturing plant. But it could be done at home as well. I'm just not set up for it (yet).
Hi Vitya , Sorry about the name mix up! Can you give me a Idea on the price of
your kit , And how to go about it If I wish to purchase It ?
regards Drecked
@drecked: Please send me a private mail and I'll send you the details. My address is in the post.
Very nice project! Why are you using a microcontroller? Wouldn't it be easier to use a high speed comparator to trigger the camera, this would make the circuit faster as well?
what about building this into a wireless remote trigger? I want to say there might be lag (where the bolt may already be gone)… but, the trigger that my D90 has being IR is quite responsive.
Which brings me to another question, could the IR sensor on the camera be made to act like this? If it's waiting for the IR to IR trigger, why not for a flash?
I'm no engineer, but this is an awesome project! 😀
@thecolor: It is definitely possible to make it trigger the IR remote – I am already working on a simple one. It only requires the disassembly of the IR remote and hooking my device up with its button. Well, if you don't want to take your expensive one apart, there is always the option to get a cheap one – eBay is full of them.
As for the camera's built in IR receiver: I'm afraid it won't work: Although it is sensitive to IR light, the circuit (and firmware) behind it expects a certain coded "message" that it can "understand". A single flash will not work. Just imagine your camera taking pictures every time somebody uses a flash in your vicinity 🙂
@Anonymous: yes, you could probably do away without a microcontroller, but I kind of used this as a learning project for me – I am fairly new (not completely lost 🙂 though) with microcontrollers. It would probably also limit its usability – this way you can adjust its functionality should you come up with a new idea to use it for.
I have a question: where can I buy one of your PCB boards? Do you just have one made per project? or do you mass produce them? Ive tried to prototype my own pcb for various projects but it is not economically feasable unless I have at least twenty made…
@My blog: You can get a PCB from me, please send en e-mail to me. My address is towards the top of the post.
Hi Vitya
The x4 Camera Terminal How It Is connected to the Audio Jack ? And Which are the pins of The Shutter Focus and GND on The Schematics ?
Thanks
@Joh: On the schematics have a look at LED3 and LED4 (trigger and meter, respectively). The same line goes to the two opto couplers, and in turn to the connector (X4). From this you can tell it's X4[1:2] is the metering and X4[3:4] is the trigger connection.
I designed this part (primarily) with my camera's remote release cable in mind. It has 3 pins: GND, Meter, Trigger. The opto couplers' emitters go to the GND of the remote release cable and the rest is obviuos. On the Nikon D300 you can connect the two emitters with no problem. For other cameras you have the option to use copmletely separate circuits. That's why I made a terminal for all four lines.
Viktor, I have emailed you about a kit. Thanks
@Rich: you may want to re-send that e-mail – I haven't received anything from you.
I do not see your email anywhere on this page. Can you email me @ david@davidimm.com please?
Look forward to hearing from you!
Anonymous: On its way!
I know this is not the point of the exercise but when I was photographing lightning, I just went out at night and used a very long exposure, about 10 minutes for film. 30 seconds for digital. And captured the real thing 🙂
http://www.flickr.com/photos/silicontrip/tags/lightning/
@Silicontrip: Nice pics! However, the method you mention can only be used at night, in total darkness. My device lets you take pictures of lightning even in daylight.
I sent an email for a Parts list and links for the Kit thanks
Viktor,
Do you have a kit available? Can't find your e-mail address…
Ken
@Anonymous: You can click on the link towards the top of the article where it says: "please e-mail me". 🙂
This is great idea! (especially on picking OPT101, never know about this IC! much more elegant way then using a regular photo transistor or CDS!)
Gonna build one in a slightly different way! (by skipping the MCU, and do everything with analog circuit. hopefully to reduce lag time. )
@Kirk Lau:Good luck with it! When it's ready, I would appreciate you let me know about it!
What is the duration of a lightening flash and what is the delay from the beginning of the flash to the circuit being triggered? Will you loose a significant portion of the lightening ray? It could be better to stop way down for a long exposure and just wait for the flash.
I am asking for the cost to send a complete unit minus the enclosure and the cable. I would need to know the wiring diagram for the cable. I have a "cheap" shutter release that I can use. Email will follow.
Jacqueline Alkula
Chillicothe, Missouri USA
Sorry about the late reply – I was out of town.
@Anonymous:
The duration of a lightning usually is from a few hundred milliseconds up to more than a second. The delay of my camera (shutter lag) is 45ms, the delay of the circuit is next to nothing, so there is plenty of time for capturing the lightning. Your idea of a long exposure only works in total darkness (i.e. night). With my trigger you can take pictures also in daylight.
@Jackie:
Please send an e-mail to me for quotation – you can use the link towards the top of the article.
You should be able to pick up a vintage replica volume or tone knob for a Fender Stratocaster on Ebay for a couple of dollars to replace the grey one. If you can get one that goes all the way to 11 that would be cool.
@Matt: Yes, I'll need to look into this – but the priority is not that high for a nice knob… 🙂
good work !!
But it's very complicated for a person who don't have good skills in electronics for create the assembly.
You use the light detection technic, another technic exist, it's to detect the radio noise of the lightning.
The advantage of the noise detection, it's that the noise is before the light and permit to win a few milliseconds from the lightning.
That permit to take photo in day or during formation of the lightning.
You can see this at : http://rienquepourlesyeux.free.fr/Detecteur%20de%20foudre/Lightning%20detector.htm
It's very easy to make the assembly for all.
@ThierryD: Sorry about the complexity – I can't help it. If you need a kit assembled I can make it for you.
About the other method: Thanks for letting me know about the idea, I will try it!
I am very interested in this kit assemblw. And a girl friend too. How to order it ? We live in Luxembourg.
@BdC: Please send a private mail (click on "e-mail me" towards the top of the article) for details.
Thank you.
I published a short review of your kit on my blog as well. Your solution merits to be known in the amateur community and I 'd be happy to test it very soon.
http://bouillondecultures.blogspot.com/2011/06/photographier-les-eclairs-avec-le-kit.html
can't find any email adress on this page, i'm probably blind….i'm very interested in your device…can you send me price info for a fully builded at fredleroux@msn.com
thank you very much.
Fred
@glockman: Just need to click on the "e-mail me" link towards the top of the article 🙂 Anyway, I am sending you the info requested in a private mail.
Complimenti un ottimo lavoro, posso sapere come fare per avere tutte le info sui pezzi per costruirlo grazie.
I would like to build one, would ya send me the info? sankot@live.com Thanks
Hallo
I would like buy zeus-lighting trigger (in full built). Please send your e-mail to me.
Perhaps I can offer something for photography (panoramic photo) what you will find interesting.
My address is "kupeca&seznam.cz" Thank you.
cool project! Im interested…. PM sent
I'm afraid I haven't received your message!
You might consider putting this on Tindie.com; easier to deal with than one-off emails.
Have you tested it and it works?
My experience is that the time required to trigger the camera is much larger than the time the lightning is "on".
This is why people use long exposures and maybe stop the exposure after the lighting struck.
Yes, it's been tested by many and it works.
The time required to trigger the camera is a few tens of milliseconds, depending on the camera model. This device ands a few microseconds to it, which is negligible. A typical strike is made of 3 or more strokes (re-strike), and the total duration is from 100ms up to 1s, so even if you miss the first strike, you have plenty to catch after the initial one.
Long exposures are, of course, a way of doing this, but you can only do that at night. With my solution you can catch them during daylight too.
Yes.. I would like to build also.
my mail : m4sbro@ yah00.com
Thx..
Private mail sent with info.
Hello Vitya.
Rearly nice project, and I would like to build one too, would you send me the info?
my mail is: a-b-c-klar@c.dk
Thank You
Hey! What info do you need? Everything youneed to know to beuild one is on this page already.
Sorry, I cant read the text /components at your diagram.
I se you sell all the components. What is your Price for a full set of
components and your Price for a fully built and tested PCB?
Thank You
Sorry, but I cant read the text/components at your diagram.
I se you sell all the components. What is your Price for a
full set of components and your Price for a fully built and testet PCB?
Thank you
Click on the schematics to see it in higher resolution. Send me a private e-mail for prices – they change all the time so it doesn't make sense to publish them.
Vitya, I understand that the purpose of this project is not necessarily the outcome, but more of the fact of just doing it. One thing that I would like to point out about photographing lightning is that this device is actually not necessary.
You can photograph lightning by setting the camera to bulb and then keep the shutter open until you see a flash of lightning. The relative difference in the brightness of the lightning bolt and a much darker ambient light will allow you to get wonderful lightning shots.
This is the method, 99% of all lightning pictures are taken. Also because it is on bulb and open for a few seconds to a few minutes you're able to capture multiple lightning strikes in one frame.
Have you been able to use this device for other purposes?
Are you sure you can use the bulb setting in broad daylight? With this setup you can shoot lightning during daylight.
And of course there is the element of being able to make this 🙂
Congratulations! Nice Part!
I didn't find any hint about what you are asking for a complete device?
One more question:
Why don't you just take a phototransistor, a NE555 and an optocoupler to trigger the camera?
Sorry, I never had a deep look into the problem ..
Please send your e-mail address for details.
I could have, but it's not as accurate. This way you can create precise delays, etc. Also, I prefer digital circuits as I am not good with analog ones…
Pingback: DIY 3D Printed Camera Dolly with Pan and Tilt Head – Viktor’s DIY Blog