 |
| Four different colours for the four different players |
Introduction
A couple of days ago I was playing Halo 4 online when my team mates asked if I could change the colour of an XBOX 360 controller’s LEDs (around the start button). After a few milliseconds of thinking (how difficult can it be to replace a few LEDs on a PCB) I replied: yes. A few minutes later, however, it got me thinking: maybe I underestimated the task and the LEDs are in some hard to reach places or are of some special shape I cannot find anywhere. (When I last time opened my controller I didn’t pay any attention to the LEDs as, in general, I am not interested in such mods.) So I decided to do it, just to see if it’s at all possible. As it turned out after a few minutes, it is possible and it is very easy.
 |
| Starting point: an unmodified XBOX 360 controller |
Taking apart the controller
Taking apart the controller is easy, but it requires a Torx screwdriver. I don’t know the exact size needed for the XBOX 360 controller, but I got it for 1USD (including shipping) on eBay. It is advertised to be the right size for this controller. And guess what, it is!
 |
| This 1USD Torx screwdriver does the job perfectly |
There are seven screws to tackle, three on either side and one in the battery compartment, under the serial number sticker.
Once all the screws are out the controller is easy to open. One word of advice: either put a piece of masking tape across all the buttons/pads or keep the controller upside down when opening, otherwise all the buttons WILL fall out when the case is opened.
You will find two similar small motors on either side of the controller – they provide the “force feedback”. To make my life easier I carefully removed them (temporarily) – those very thin wires don’t seem to withstand a lot of stress…
Locating the LEDs
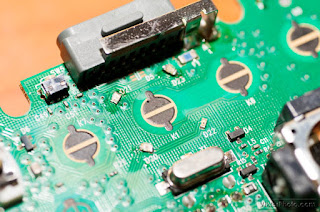
When there is nothing left but the motherboard of the controller, I easily located the 4 LEDs responsible for the lights around the Start button:
 |
| If you ever played with XBOX 360, you know where to look for the LEDs… |
As far as I know, there are a few different hardware revisions of the XBOX 360 controller, so each may be somewhat different from this one above. However, they should all have the same 4 LEDs under the Start button.
 |
| In my controller D20, D21, D22, D23 are the LEDs that “need” replacing. |
The LEDs seem to be 0603 or even 0402 size, can’t really tell, so tiny. It doesn’t even matter! I didn’t happen to have the same size, only some 0805 size which are slightly larger than what the PCB is designed for, but this couldn’t stop me from replacing the original LEDs.
Replacing the LEDs
To remove the original LEDs and solder in the new ones I used a hot air soldering station. I’m sure you can do it with a traditional soldering iron; using hot air instead just seemed the easier way to go.
The temperature of the soldering station is very important: too low temperature and the solder will not melt (and in time, it will overheat the whole board), too high temperature and the surrounding parts will also fall off (especially on the other side of the PCB). I set the airflow of the soldering station to the minimum so that the LEDs I want to solder in won’t be blown away.
The polarity of the LEDs are important. To find out the correct one I used a digital multimeter to determine the cathode and anode.
 |
| Three LEDs are replaced, the fourth should stay green. You can see the new ones are slightly bigger than the original one. |
Finishing up
Once all the LEDs are in place the same steps (in reverse order) must be taken to assemble the controller. If you like taking it apart again, feel free to forget to put the rumble motors in, like I did 🙂
This whole mod took about 10 minutes, including putting it together twice… And the result:


