

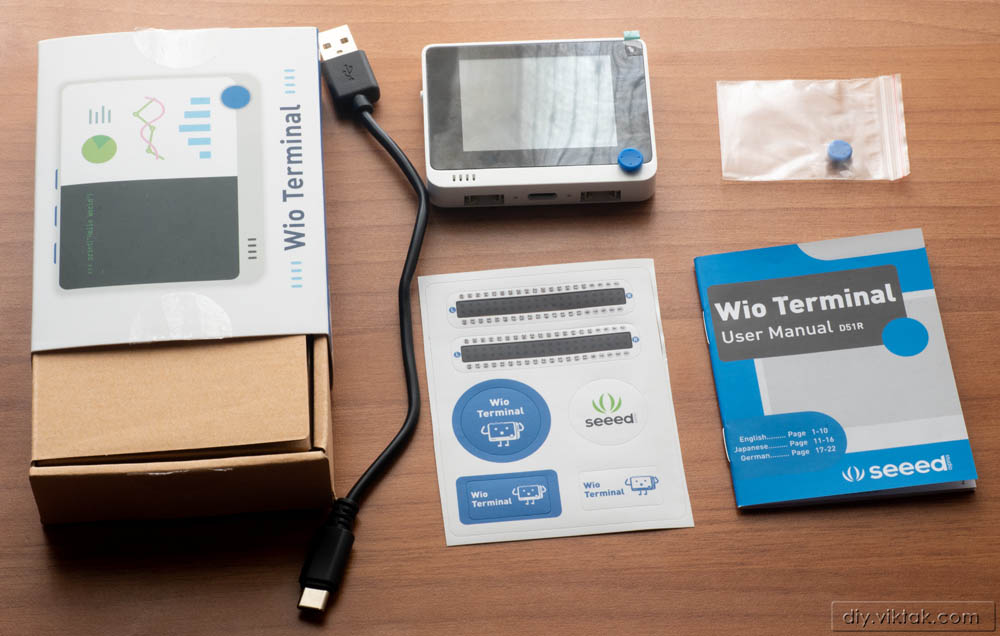
Recently, SeeedStudio sent me a Wio Terminal for review. The Wio Terminal is powered by Microchip’s ATSAMD51P19. I had no prior development experience with the core (ATSAMD51) or with the built-in network chip (Realtek RTL8720DN), so it took me some research to get familiar with this development board. In the following I am sharing my findings through this exercise, and my verdict at the bottom of this article. I’d love to hear about some of your findings, in the comments down below.
Throughout this article I am going to use Visual Studio Code with PlatformIO as the development environment. If you don’t have them set up, I strongly recommend installing them first, as the development experience is “light years” better than the Arduino IDE and most other options. I am not going into details as to how to get the development environment ready as it is straightforward and is well documented on SeeedStudio’s own web site.
Real life project as a learning experience
Usually, when I want to learn something new, be it a programming language, a new technique, a new device (or anything, really), I usually find a real life project where I can fit it in. For learning the Wio Terminal, I decided to marry it with my existing Home Assistant home automation system, so the idea for a real-life dashboard to go with Home Assistant was born. In the following, I will present a simplified version of the project. The reason for omitting some parts of the full system is to better focus on the Wio Terminal itself, my experiences with it with the least amount of “distraction”. Still, however, I will show a full working example taking advantage of some of the awesome features of the Wio Terminal, such as built-in dual-band 2.4Ghz / 5Ghz Wi-Fi, 2.4″ color LCD, buttons, beeper, etc.
Readers of my blog are probably aware that I have a home automation system in my home. In a nutshell: I have several smart devices around the house, most of which I created myself. I also have Home Assistant (a privacy friendly, free and open source home automation system) acting as a central hub, where all the sensors and actuators “gather”. The “glue” that connects all these physical devices together is MQTT, which is a standardized, lightweight, open source communication protocol specifically designed for IoT communication. The following project will build on my existing home automation system and my experience with IoT systems mostly built with ESP8266 and ESP32.
Humble beginnings
The Wio Terminal can be programmed using several methods, i.e. Arduino framework, CircuitPython, Micropython, ArduPy. Because of my previous experience with the Arduino framework, I decided to go with the same again, keeping the new/unknown things in the project at a manageable amount. Using it in PlatformIO is as simple as adding the following line to the platformio.ini file:
|
1 |
framework = arduino |
While we are on the subject of platformio.ini, let me mention that my code uses several existing open source libraries, such as the following awesome libraries which I use in almost all of my projects (in alphabetical order):
- ArduinoJson – for dealing with JSON strings
- Button2 – for simplified button management
- PubSubClient – for MQTT communications
- Timezone and TimeChangeRules – for customizing date/time related items
Furthermore, I used some Wio Terminal specific libraries provided by SeeedStudio.
I encourage you to check out the complete platformio.ini file.
Stealing code (from myself)
Since I already had developed several of the required component code, all I had to do was to port them to the new processor. This job was relative straightforward thanks to SeeedStudio’s Arduino framework compatible libraries. However, not all code could be reused, as certain things work a little differently in the ATSAMD51 world than in the ESP world. Functionalities that needed some degree of adjustment/rework include:
- IO pins: for obvious reasons
- “Low level” processor commands, such as
ESP.reset() - Settings management: While the ESP line of processors mostly have some SPI flash memory attached to them (sometimes within the chip it self, sometimes somewhere else on the board), the Wio Terminal doesn’t have any. (Truth be told, there is an SD card socket built-in, but you have to use your own SD card, which brings some complications of its own. Can you trust the user to always have an SD card attached? etc.)
Being able to adapt a large portion of my old code to the new environment sped up development greatly.
Wio Terminal meets Home Assistant
The final code (in the simplified) Home Assistant Dashboard has the following features:
- WiFi connection management using rpcWiFiManager.
- Time management using RTC and NTP.
- Sending “heartbeat” messages using MQTT. This is used in Home Assistant to learn about IoT devices failing somewhere. I.e. if a device doesn’t send a “heartbeat” message every few minutes (configurable by the user), Home Assistant knows that there is a problem with the device and can either send it a special message in an attempt to bring it back from the (half)dead, or can send me a message so that I can go and fix it.
- Subscribing to a host of topics which contain the information to be displayed on the built in LCD of the Wio Terminal.
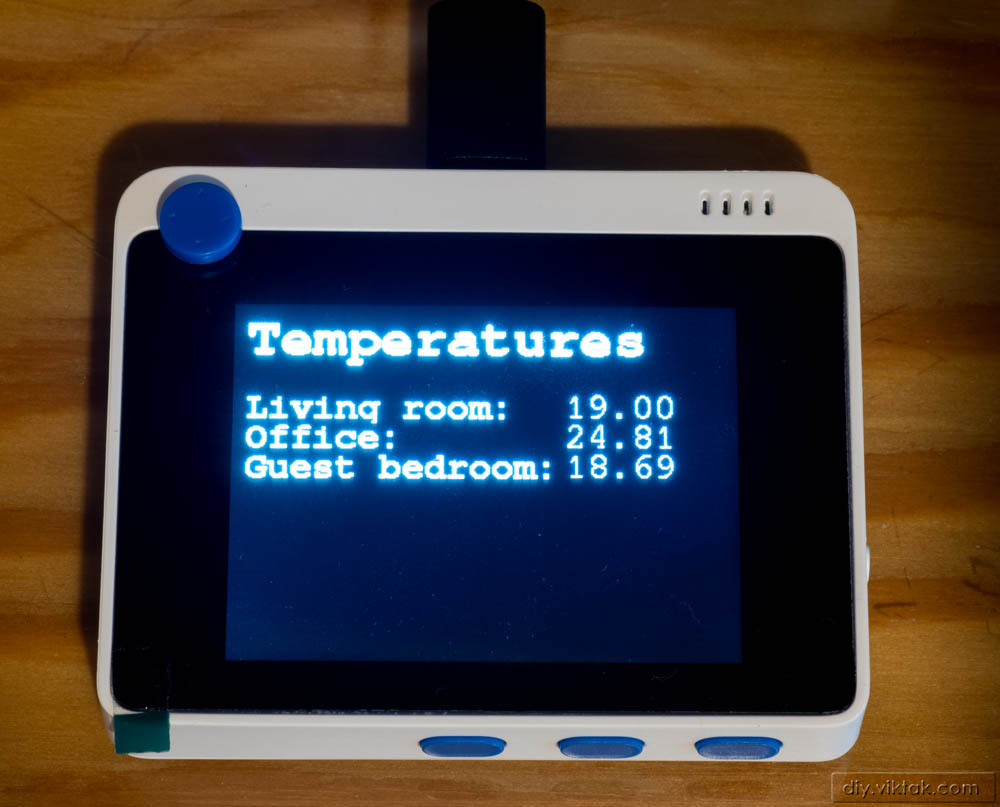
- Displaying a page-able screen with different kinds of information received from other smart devices in the house. In this scaled down version I show three pages worth of information: temperatures, load of Raspberry Pi devices, expiry of SSL certificates.
- Paging of the displayed data is facilitated by two of the buttons on the Wio Terminal:
WIO_KEY_AandWIO_KEY_B. - Sending some debug/status messages on the built in serial port of the Wio Terminal.
A typical boot log looks like this:
|
1 2 3 4 5 6 7 8 9 10 11 12 13 14 15 16 17 18 19 |
Booting node: 536914076... Hardware ID: Wio Terminal Hardware version: 1.0 Software ID: Hello World Software version: v0.1.14 - 2022-01-10 13:02:49.098308 Friendly name: Very friendly name MQTT server: 192.168.1.99 MQTT topic: WioTerminal *WM: *WM: AutoConnect *WM: Connecting as wifi client... *WM: Using last saved values, should be faster *WM: Connection result: *WM: 3 *WM: IP Address: *WM: 192.168.1.115 HTTP server started. Setup complete. |
Sample MQTT message coming from my own smart thermometers:
|
1 2 |
Topic: viktak/spiti/officehall/thermometers/28:FF:05:C8:54:15:03:AB Payload: 23.69 |
Sample MQTT message coming from a Raspberry Pi:
|
1 2 3 4 5 6 7 8 9 10 11 12 13 14 15 16 17 18 19 20 21 22 23 24 25 26 27 28 29 30 31 32 33 |
{ "System": { "Hostname": "mc2", "TimeStamp": "Mon 10 Jan 13:16:01 EET 2022", "Model": "Raspberry Pi Model B Rev 2", "Architecture": "armv6l", "Uptime": "5 days, 23 hours, 59 minutes", "Load1": 1.03, "Load5": 0.97, "Load15": 0.99, "LastUpdated": "Jan 4 13:35" }, "CPU": { "CPUs": 1, "CoresPerSocket": 1, "ThreadsPerCore": 1, "OSPretty": "Raspbian GNU/Linux 11 (bullseye)", "CPUtemp": 51.9 }, "Memory": { "TotalMemory": 439972, "FreeMemory": 48508 }, "Storage": { "TotalDiskSpace": 15026928, "DiskFreeSpace": 12555764, "TotalSwap": 102396, "FreeSwap": 101628 }, "Network": { "IPAddress": "192.168.1.81" } } |
Sample MQTT message coming from a Linux bash script that keeps an eye on the validity of certificates I manage:
|
1 2 3 4 5 6 7 8 9 10 11 12 13 |
{ "Certificates": { "andthatshowitsdone.viktak.com": { "ExpiresIn": "33" }, "viktak.com": { "ExpiresIn": "33" }, "diy.viktak.com": { "ExpiresIn": "33" } } } |
The full source code can be viewed and downloaded in this Github repository!
Summary
The good stuff
In my opinion these are the strongest features of the Wio Terminal:
- Dual WiFi – Although for most IoT applications the bandwidth of the more traditional 2.4GHz WiFi is sufficient (and when it is, it is even better than the 5GHz WiFi because it travels better through walls), it is nice to have the option to use the newer and faster WiFi standard when higher throughput is needed.
- Integrated LCD – Having an integrated color screen is always a plus.
- Built-in magnets – This little, but smart addition helps you put the Wio Terminal in more places than the usual development board.
- Raspberry Pi compatible GPIO header (with stickers!) – Makes it easy to not only interface with the Raspberry Pi, but also to any existing Raspberry Pi peripheral.
- Arduino framework support – Makes the learning curve a lot easier to manage.
- Has a lot of other hardware peripherals built in. – This allows its use in a wide range of applications.
- Easy USB connectivity – No external USB-Serial converters needed
- Plenty of sample code for the beginner to learn from.
- Can be used as a full featured development board – No need to make a separate development board for it.
- Machine learning capability – I will write a separate article about this in the future.

Room for improvement
Nothing is perfect, so I also identified some areas for improvement with the board. These issues are not necessarily deal breakers, it depends on your requirements and preferences.
This is my highly subjective list of things I would love to see improved for the next version of the Wio Terminal (in order of importance for me). Let me know in the comments what are some of yours.
- WiFi and line charts do not work at the same time: I think this is one of the major issues. Since the primary group target applications of the Wio Terminal is connected IoT devices, any function that cannot work together with the connectedness has little value. You could argue that you can use BLE instead of WiFi, but…
- No built-in memory for storing application configuration. I found an emulated EEPROM library for the ATSAMD51P19, but, although it works, it is not ideal for the following two reasons:
- It gets reset every time a new firmware is uploaded – very annoying during development.
- It wears out the memory relatively quickly – of course, this depends on how often you change data stored there.
- The built-in buzzer is very weak – It is so faint it is practically not existent. It may be used as feedback for pressing a button, or similar things, but I wouldn’t rely on it alarming anyone nearby.
All in all, I think that the Wio Terminal is a very capable development board/IoT device with some minor shortcomings that are easy enough to compensate for with clever design.
I thank SeeedStudio for this sample product. It not only allowed me to learn something new and useful, but it gave me an opportunity to give something back to the community: I hope that this article will be useful to some just getting their feet wet in the realm of IoT.
