 |
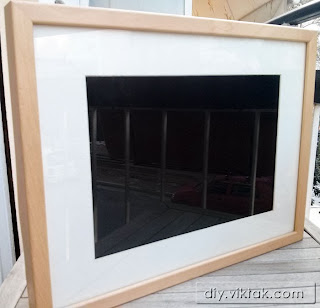
| Finished look |
Introduction
Years ago, before I started this blog, I created a digital picture frame out of an old laptop and two wooden picture frames from IKEA. The choice of operating system was Windows XP because I had a license that I didn’t need any more and, coming from a strong Windows background, it was the obvious and comfortable choice for me. This setup has worked well for years, with no problem at all.
Recently, I needed to make another digital picture frame, but this time I was out of Windows XP licenses. So I decided to make it run some flavor of Linux.
I have never used Linux before, so this created an opportunity for me to learn something new.
 |
| Finished look – from the inside – and no, it’s not upside down… |
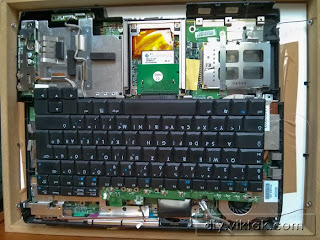
Hardware
An old
HP Compaq nx9010 kindly donated some of its guts for reuse.
The main hardware parameters of the laptop are as follows:
- Intel Pentium 4 CPU running at 2.4GHz
- 512MB RAM, of which the display uses some, as the system reports only 440MB RAM
- 14″ 4:3 LCD display with 1024*768 resolution
- Built-in Ethernet adapter (no WiFI)
- Some 30GB IDE hard disk
- 2 USB ports
Couple of tricks
To make this laptop suitable for digital picture frame conversion, I changed/added the following parts:
- Got rid of the hard disk and replaced it with a cheap 8GB Compact Flash card that connects to the IDE connector on the motherboard through a $1 CF-IDE adapter. This is important to reduce noise coming from the picture frame and to lower power consumption. Both card and adapter are from eBay.
- I added a cheap mini USB WiFi adapter, also from eBay, to allow wireless connection to my home network and avoid extra cables on the wall.
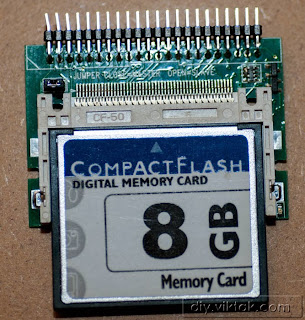 |
| This memory card replaces the hard disk. |
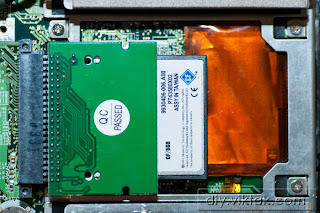 |
| The memory card is in the hard disk bay. |
Conversion into a picture frame
Since each laptop is different one can only give a general idea as to how to transfer the “contents” of a laptop into a picture frame. Below you can find a number of images taken while working on the physical conversion:
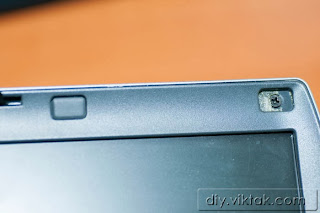 |
| Make sure to find and remove these hidden screws around the display panel. |
 |
| I used soft drink caps as stand-offs |
 |
| Bits of the laptop enclosure had to be “Dremeled” away… |
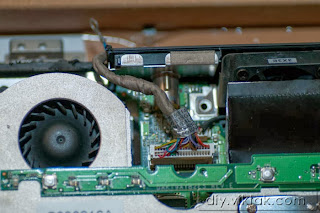 |
| …to make room for the display cable. |
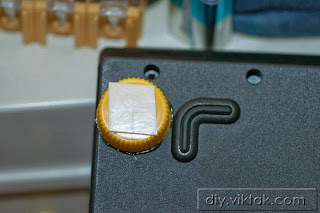 |
| A piece of double sided tape on the stand-offs help in temporarily fix the major parts in position. |
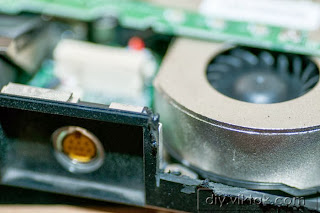
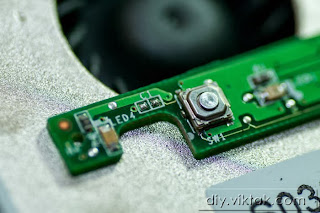 |
| This is the Power button. |
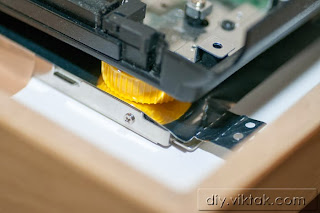
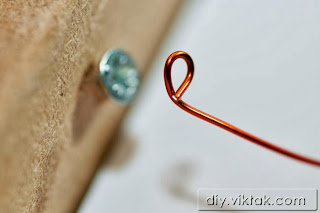 |
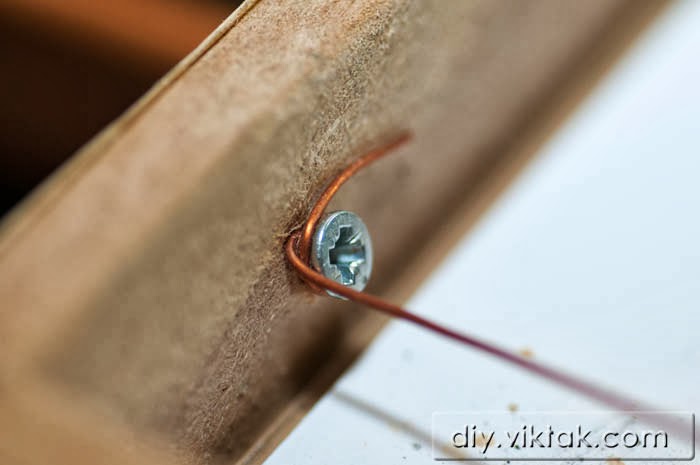
| A strong, 1mm copper wire holds the assembly in place. The ends are screwed in the frame on either end. |
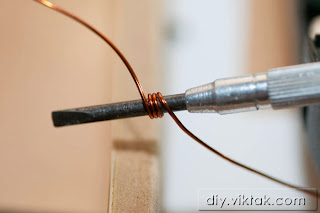 |
| Preparing the end of the wire. |
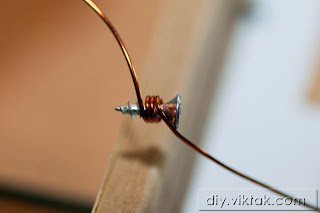 |
| Ready to screw in. |
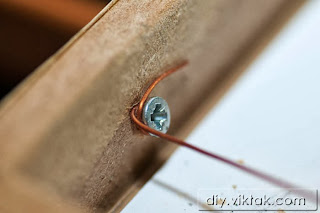 |
Screwed up in! |
Operating system selection
Since I was a complete newbie in the Linux world, I had to start at the basics. I learnt a lot during this process: I downloaded more than half a dozen flavors/versions of Linux, I installed and configured them on a test computer. After months of experimenting, finally I was able to put a system together that works reliably with zero maintenance required.
The operating system of choice is Xubuntu, which is a community‑developed, Ubuntu‑based Linux operating system. I like this system because it’s relatively fast compared to Ubuntu, for example even on the old laptop I was going to install it.
Installation
To set up the system I followed the following steps:
- I downloaded the latest version (13.04) of Xubuntu for a 32 bit system.
- I created an installation medium using LinuxLive USB Creator 2.8.22. As a medium I chose to use a 4GB USB stick I had. If you don’t have a USB stick you can also make a DVD and install Xubuntu from there.
- Install Xubuntu. It is pretty straightforward; even for someone with zero experience in Linux it only takes a few clicks on the Next button to do this. As long as your computer meets the hardware requirements, you can’t go wrong with it.
- One thing to watch out for: at some stage it asks if you want to log in manually every time. You should answer: Log me in automatically. If you forget this, it’s not a big problem, you can still set it up later in Settings Manager.
- After the reboot at the end of the installation, I was prompted to install several updates, so I did that.
Configuration
These are the steps I used to configure the system:
Set up power management
Using the following settings we can prevent the computer to go to low power states after a certain period of time, which is default on most systems these days.
In Settings Manager click Power Manager and make sure your settings match the ones seen in the following screenshots:
Disable screen saver
Use the following settings to prevent the computer from using any of the installed screen savers. In Settings Manager click Screen Saver and make sure your settings match the ones seen in the following screenshot:
Set up slideshow
We need to install a small program from the depository that will do the actual slideshow. It’s called feh. This is how to install it:
- Start Ubuntu Software Center
- In the search box type feh
The first item on the list should be feh. Click on it to select it, then click Install.
Set up networking
Since I want to be able to change the pictures on the digital picture frame and my other workstations are all Windows computers, I need to install SAMBA, which is a package that allows Linux based systems to share and access folders to and from Windows computers. If one doesn’t want this functionality, this step can be skipped.
- Start Ubuntu Software Center
- In the search box type samba. The first item on the list should be Samba. Click on it to select it, then click Install.
- After successful installation, in Settings Manager, click Samba.
- In Preferences click Samba users.
- Add a user. I added the same user that I used to log in to Xubuntu. Then click OK to close the dialog box.
- Click the Add button to add a new share.
- Select a folder you want to keep the pictures for the slideshow in.
- Give a name to the share. Also, make sure it is writable and visible.
- On the Access tab give access to the user you created in step 5. Then click OK to close the dialog box.
Set up the command that will be launched at every system start.
- In Settings Manager click Session and Startup.
- On the Application Autostart tab, click Add, and give a name and description to the slideshow.
Enter this for command: feh -z -D600 -F –hide-pointer {path-to-your-images}
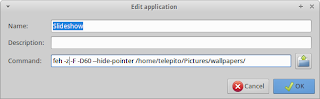 |
The above example makes it play the pictures in full screen, random order, and shows each image for 10 minutes.
|
To see all the possible options for using feh, issue the man feh command in a terminal window.
- Click OK and restart your system.
At this stage the old laptop is fully configured to be a shiny new digital picture frame – after reboot the slideshow should start automatically.