Introduction
I have been using a 500GB Verbatim Gigabit NAS External Hard Drive for backup purposes for the last few years with no problem – I can recommend it to anyone. Now, that I ran out of space I looked into the possibility of replacing its hard disk for a bigger one (economic solution) rather than getting a new NAS (ideal solution). The disk that used to be in it can be used for some other purpose (to be determined at a later time).
There are only a handful of tools needed to complete the upgrade.
- a small screwdriver with a flat tip
- a medium sized screwdriver with a cross tip (Philips)
Apart from these you only need a bit of patience to not harm the drives and/or the internal electronics of the NAS.
Opening the enclosure
On the bottom side of the enclosure there are 3 tiny holes at the back end. Use a small screwdriver with a flat tip to flick them open. Once they are out of the way, the back panel (which has the holes for all the connectors) slides off easily. Don’t force the flaps in the holes – they are easy to break.
 |
| Back panel removed. If you go any further the warranty will most probably be void. Proceed with care! |
With the back panel removed, the internal parts slide out with a bit of help. There are some adhesive pads attached to the hard disk that make the sliding a bit difficult, but there is nothing glued to the enclosure, so you can insist on pulling it out, you can not do any damage here. I found it works much easier if I hold the enclosure upside down in my hands.
 |
| Sliding, sliding… |
Removing the hard disk
The hard disk is held in place by 6 screws, 3 on either side. The two middle ones are hidden behind some adhesive padding. These little cushions must be removed to get access to the screws. Once the screws are all removed, the hard disk can be lifted. While gently lifting the hard disk, detach the SATA connectors (both power and data) from it.
 |
| That piece of padding hides a screw. |
 |
| Screw revealed. |
 |
| This is how the internals look with the hard disk removed. |
Assembly
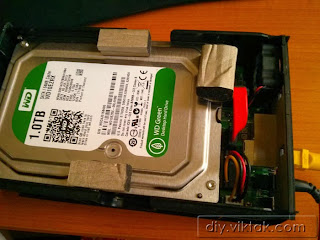
To assemble the NAS, simply follow the above steps in reverse order.
 |
| New hard disk in place and connected. |
Using the disk for the first time
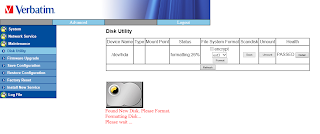
After installing the new disk in the enclosure, before fully assembling the NAS, I recommend connecting all the necessary cables and testing if everything works OK. When visiting its built-in management web page, a message, saying the disk needs to be formatted, is waiting. Select the file system of your choice from the dropdown list, click on Format, then wait until it finishes. Do not switch off the NAS during this process.
When the formatting process is finished, you can safely switch off the NAS.
Finishing touches
Disconnect all cables, assemble the unit, and the upgraded NAS is ready to use!


